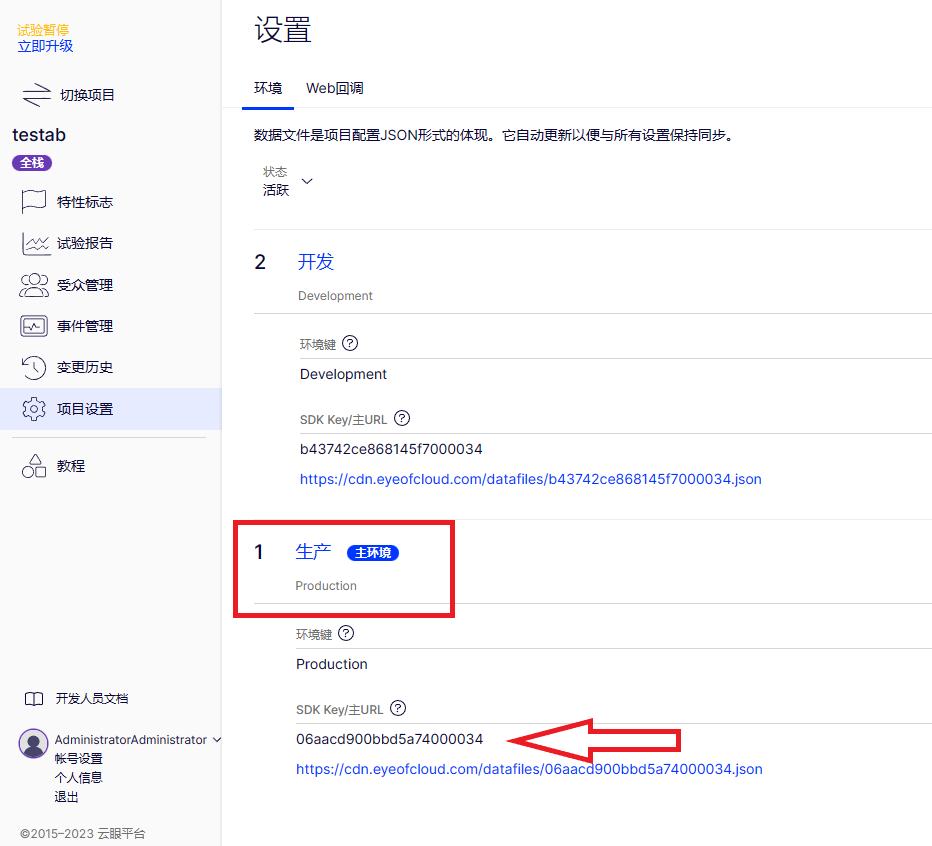
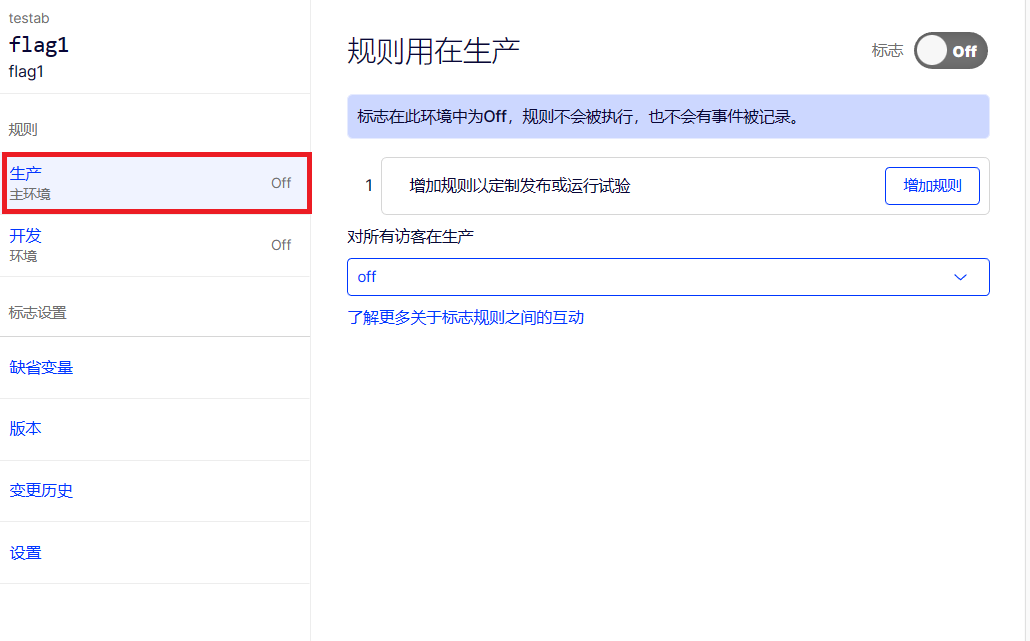
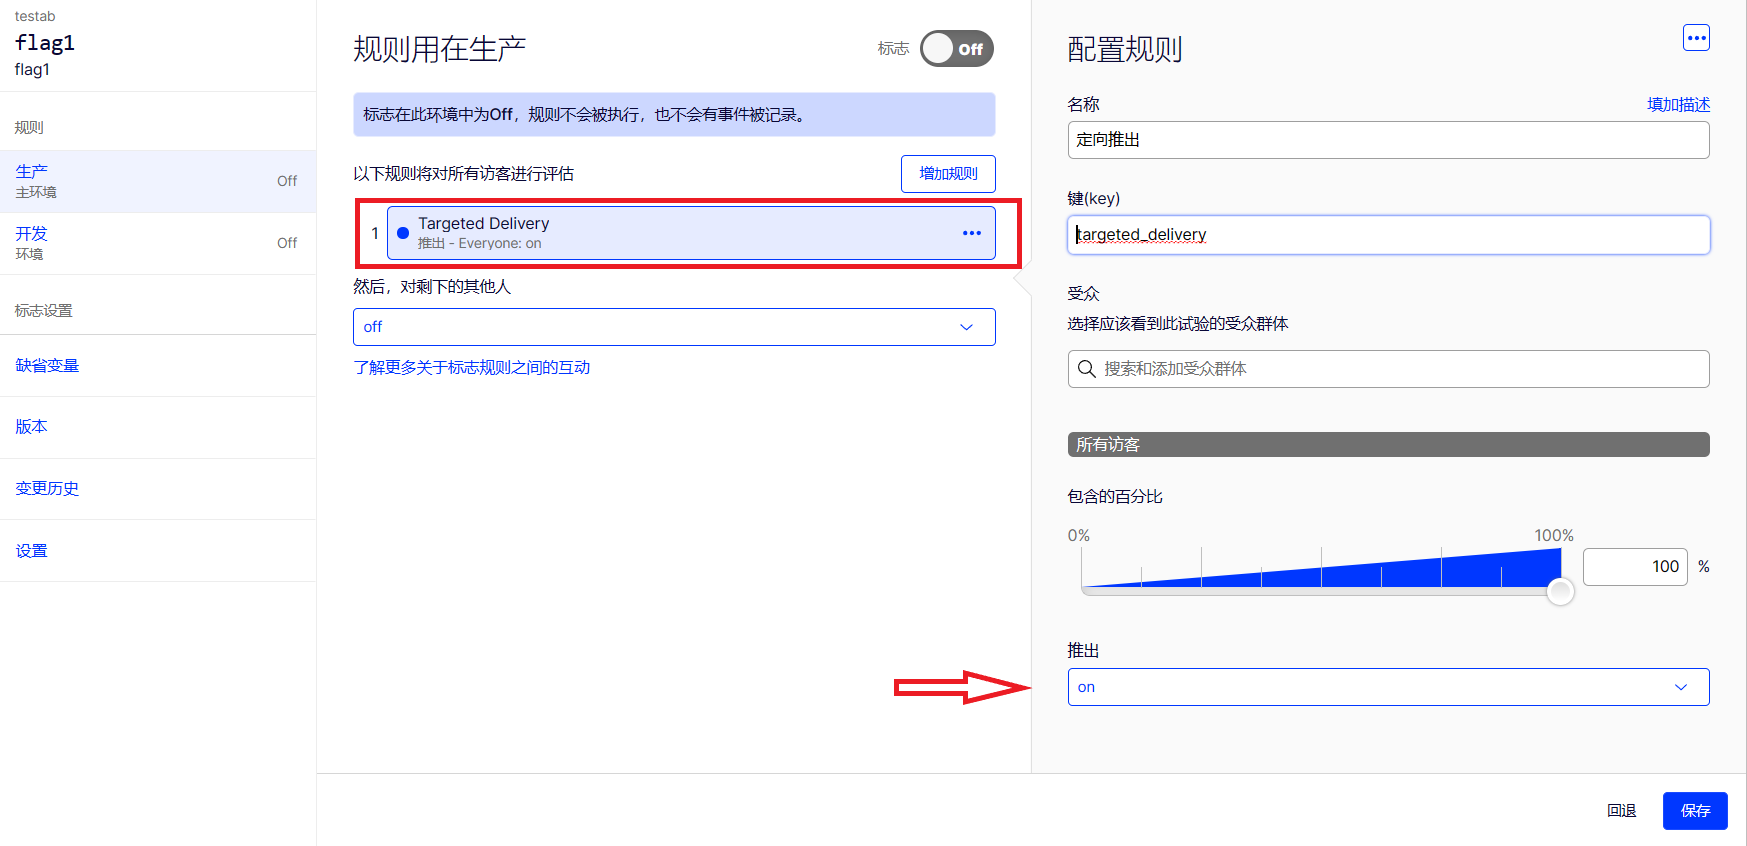
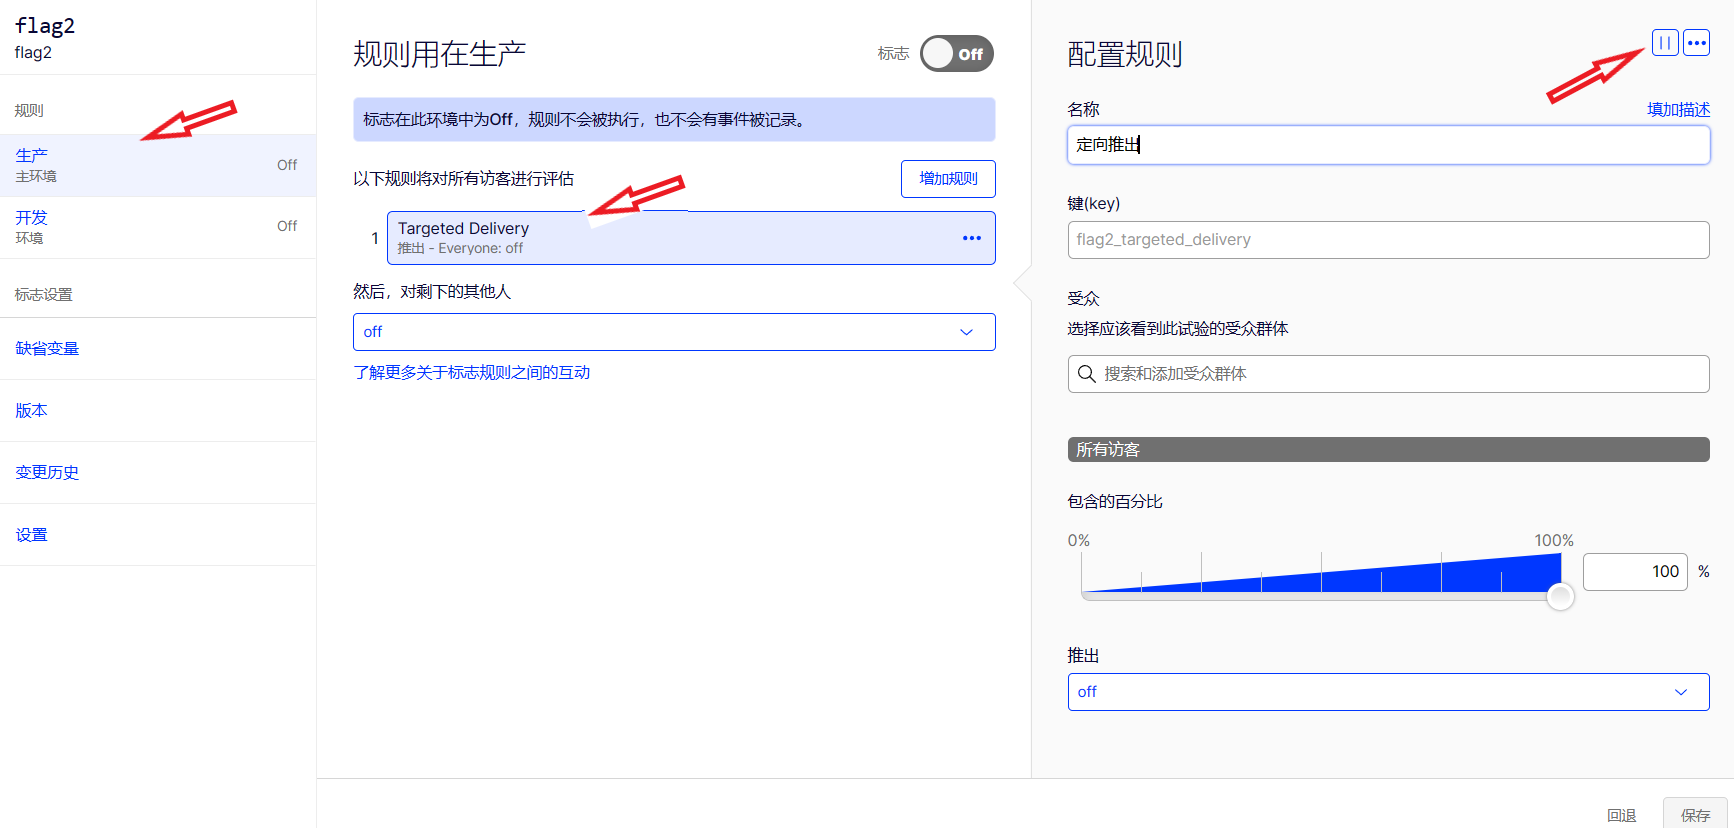
import randomfrom eyeofcloud import eyeofcloudeyeofcloud_client = eyeofcloud.Eyeofcloud(sdk_key="<YOUR_SDK_KEY>")if not eyeofcloud_client.config_manager.get_config(): raise Exception("Eyeofcloud client invalid. Verify in Settings>Environments that " "you used the primary environment's SDK key")on_flags = Falsefor _ in range(10): # -------------------------------- # to get rapid demo results, generate random users. # Each user always sees the same variation unless you reconfigure the flag rule. # -------------------------------- user_id = str(random.randrange(1000, 9999)) # -------------------------------- # Create hardcoded user & bucket user into a flag variation # -------------------------------- user = eyeofcloud_client.create_user_context(user_id) # "product_sort" corresponds to a flag key in your Eyeofcloud project decision = user.decide("product_sort") if not decision.variation_key: print(f"decision error {', '.join(decision.reasons)}") sort_method = decision.variables["sort_method"] # -------------------------------- # Mock what the users sees with print statements # (in production, use flag variables to implement feature configuration) # -------------------------------- # always returns false until you enable a flag rule in your Eyeofcloud project if decision.enabled: on_flags = True print( f"\nFlag {'on' if decision.enabled else 'off'}. User number {user.user_id} saw flag variation: {decision.variation_key}" f" and got products sorted by: {sort_method} config variable as part of flag rule: {decision.rule_key}" )project_id = eyeofcloud_client.config_manager.get_config().project_idif not on_flags: print("Flag was off for everyone. Some reasons could include:") print("1. Your sample size of visitors was too small. Rerun, or increase the iterations in the FOR loop") print("2. By default you have 2 keys for 2 project environments (dev/prod). Verify in Settings>Environments " "that you used the right key for the environment where your flag is toggled to ON.") print(f"Check your key at https://app.eyeofcloud.com/v2/projects/{project_id}/settings/implementation")
Flag on. User number 6998 saw flag variation: on and got products sorted by: popular_first config variable as part of flag rule: targeted_deliveryFlag on. User number 1177 saw flag variation: on and got products sorted by: popular_first config variable as part of flag rule: targeted_deliveryFlag on. User number 9714 saw flag variation: on and got products sorted by: popular_first config variable as part of flag rule: targeted_deliveryFlag on. User number 4140 saw flag variation: on and got products sorted by: popular_first config variable as part of flag rule: targeted_deliveryFlag on. User number 4994 saw flag variation: on and got products sorted by: popular_first config variable as part of flag rule: targeted_deliveryFlag off. User number 8700 saw flag variation: off and got products sorted by: alphabetical config variable as part of flag rule: default-rollout-208-19963693913Flag off. User number 9912 saw flag variation: off and got products sorted by: alphabetical config variable as part of flag rule: default-rollout-208-19963693913Flag on. User number 6560 saw flag variation: on and got products sorted by: popular_first config variable as part of flag rule: targeted_deliveryFlag on. User number 9252 saw flag variation: on and got products sorted by: popular_first config variable as part of flag rule: targeted_deliveryFlag on. User number 6582 saw flag variation: on and got products sorted by: popular_first config variable as part of flag rule: targeted_delivery
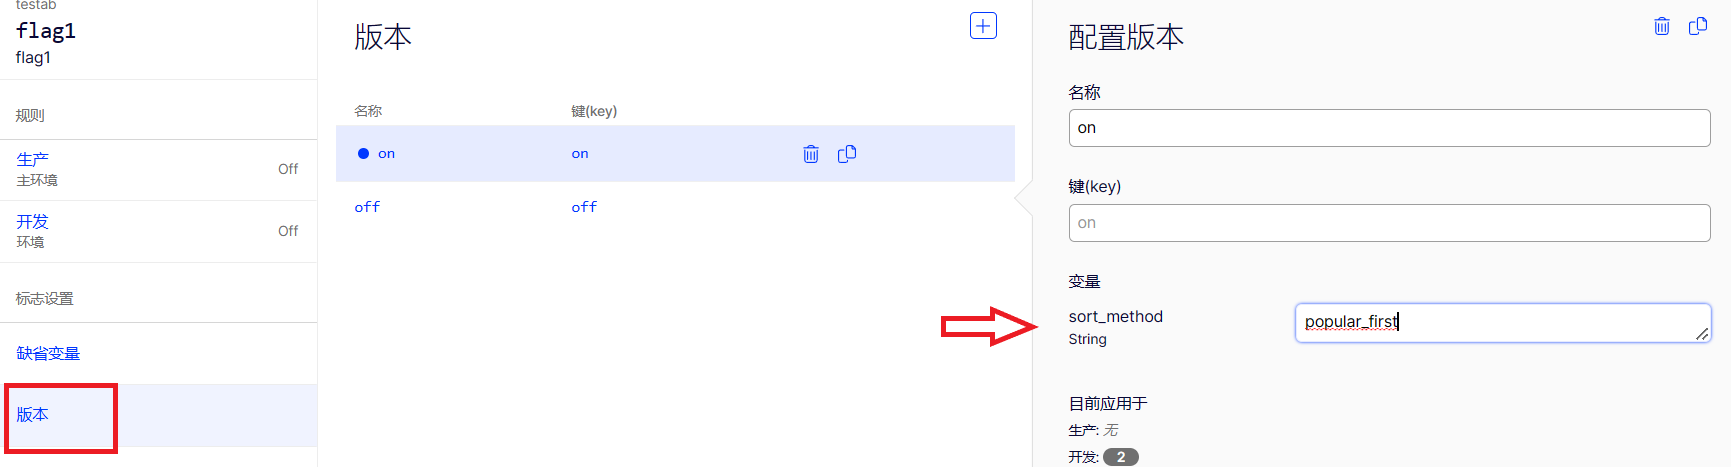
user = eyeofcloud_client.create_user_context(user_id)# "product_sort" corresponds to the flag key you create in your Eyeofcloud projectdecision = user.decide("product_sort")
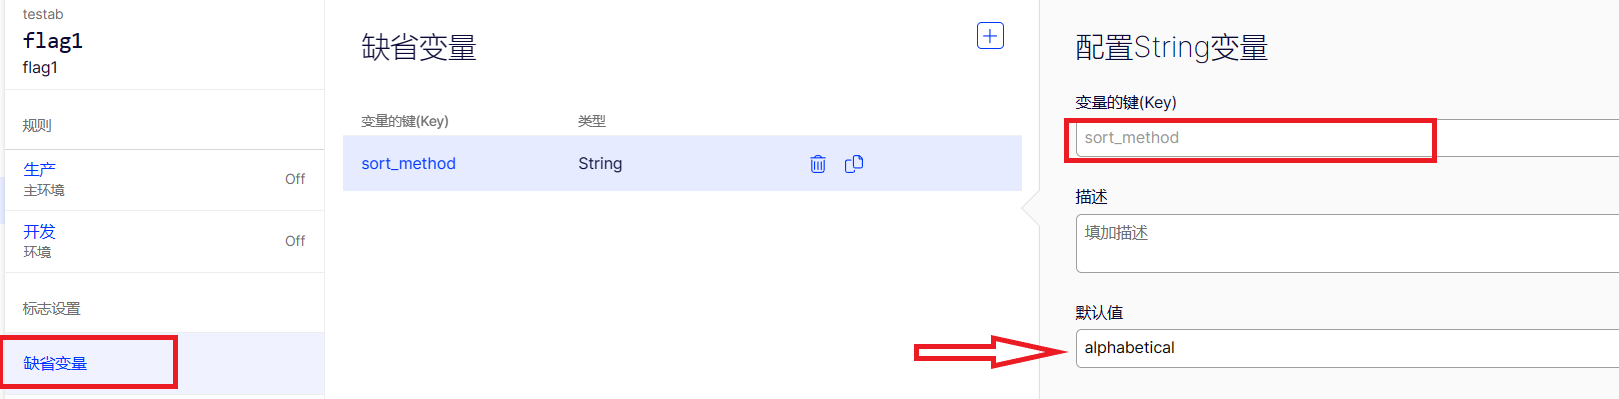
# always returns false until you enable a flag rule in your Eyeofcloud projectif decision.enabled: # "sort_method" corresponds to flag key you define in your Eyeofcloud project sort_method = decision.variables["sort_method"] print(f"sort_method {sort_method}")
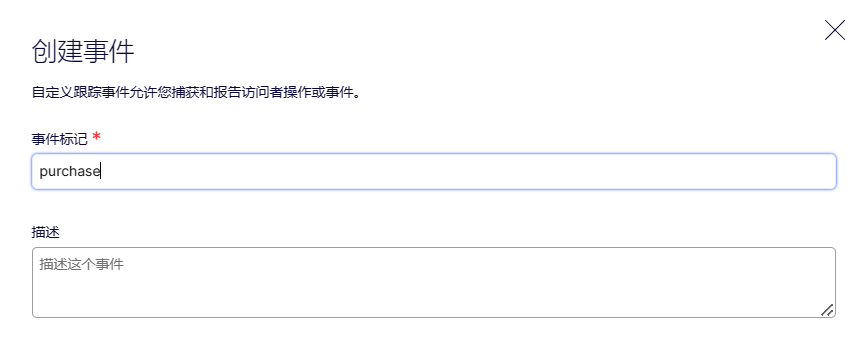
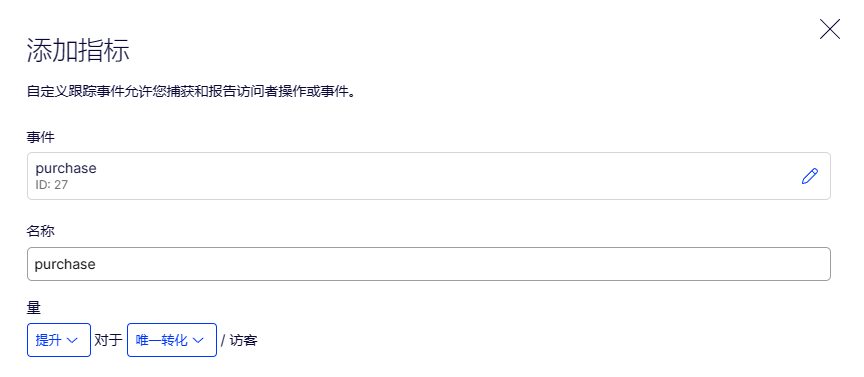
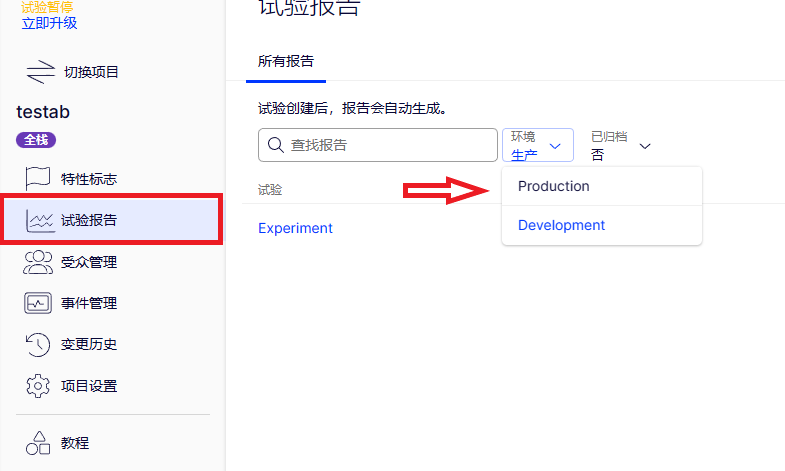
import randomimport loggingimport jsonfrom eyeofcloud import eyeofcloudfrom eyeofcloud.helpers import enumseyeofcloud_client = eyeofcloud.Eyeofcloud(sdk_key="<YOUR_SDK_KEY>")if not eyeofcloud_client.config_manager.get_config(): raise Exception("Eyeofcloud client invalid. Verify in Settings>Environments that " "you used the primary environment's SDK key")""" -------------------------------- OPTIONAL: Add a notification listener so you can integrate with third-party analytics platforms --------------------------------def on_decision(decision_type, user_id, attributes, decision_info): # Add a DECISION Notification Listener for type FLAG if decision_type == 'flag': serialized_json_info = json.dumps(decision_info) print(f"Feature flag access related information:{serialized_json_info}") # Send data to analytics provider herenotification_id = eyeofcloud_client.notification_center.add_notification_listener( enums.NotificationTypes.DECISION, on_decision)"""# mock tracking a user event so you can see some experiment reportsdef mock_user_event(): answer = input(f"Pretend that user {user.user_id} made a purchase? y/n \n") if answer.lower() == 'y': # track a user event you defined in your Eyeofcloud project user.track_event("purchase") print(f"Eyeofcloud recorded a purchase in experiment results for user {user.user_id} ") else: print(f"Eyeofcloud didn't record a purchase in experiment results for user {user.user_id}")on_flags = Falsefor _ in range(5): # -------------------------------- # to get rapid demo results, generate random users. # Each user always sees the same variation unless you reconfigure the flag rule. # -------------------------------- user_id = str(random.randrange(1000, 9999)) # -------------------------------- # Create hardcoded user & bucket user into a flag variation # -------------------------------- user = eyeofcloud_client.create_user_context(user_id) # "product_sort" corresponds to a flag key in your Eyeofcloud project decision = user.decide("product_sort") if not decision.variation_key: print(f"decision error {', '.join(decision.reasons)}") sort_method = decision.variables["sort_method"] # -------------------------------- # Mock what the users sees with print statements # (in production, use flag variables to implement feature configuration) # -------------------------------- # always returns false until you enable a flag rule in your Eyeofcloud project if decision.enabled: on_flags = True print( f"\nFlag {'on' if decision.enabled else 'off'}. User number {user.user_id} saw flag variation: {decision.variation_key}" f" and got products sorted by: {sort_method} config variable as part of flag rule: {decision.rule_key}" ) mock_user_event()project_id = eyeofcloud_client.config_manager.get_config().project_idif not on_flags: print("Flag was off for everyone. Some reasons could include:") print("1. Your sample size of visitors was too small. Rerun, or increase the iterations in the FOR loop") print("2. By default you have 2 keys for 2 project environments (dev/prod). Verify in Settings>Environments " "that you used the right key for the environment where your flag is toggled to ON.") print(f"Check your key at https://app.eyeofcloud.com/v2/projects/{project_id}/settings/implementation")else: print("\nDone with your mocked A/B test.") print(f"Check out your report at https://app.eyeofcloud.com/v2/projects/{project_id}/reports") print("Be sure to select the environment that corresponds to your SDK key")
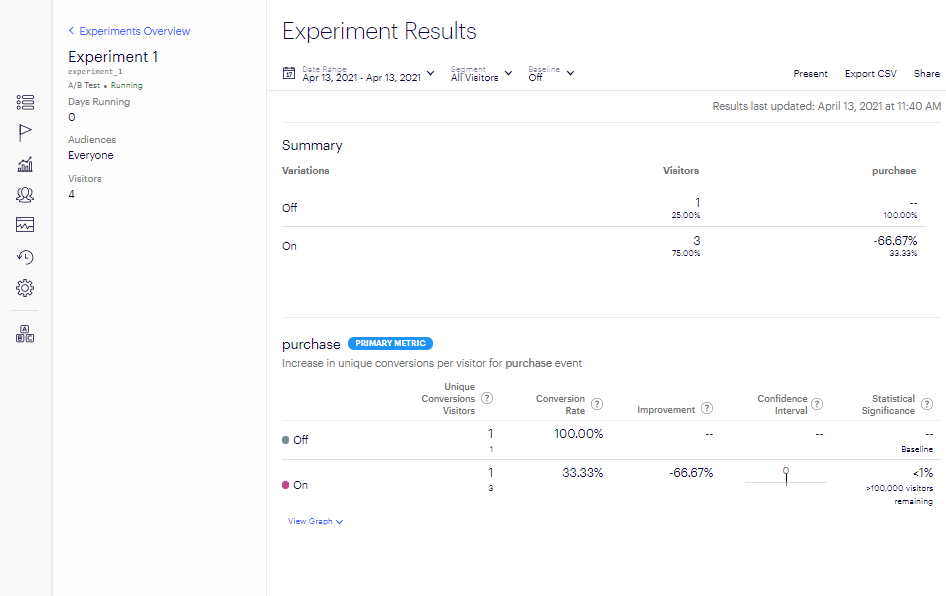
Flag on. User number 1496 saw flag variation: on and got products sorted by: popular_first config variable as part of flag rule: experiment_1Pretend that user 1496 made a purchase? y/nnEyeofcloud didn't record a purchase in experiment results for user 1496Flag off. User number 1194 saw flag variation: off and got products sorted by: alphabetical config variable as part of flag rule: experiment_1Pretend that user 1194 made a purchase? y/nyEyeofcloud recorded a purchase in experiment results for user 1194Flag off. User number 5815 saw flag variation: off and got products sorted by: alphabetical config variable as part of flag rule: experiment_1Pretend that user 5815 made a purchase? y/nyEyeofcloud recorded a purchase in experiment results for user 5815Flag on. User number 1248 saw flag variation: on and got products sorted by: popular_first config variable as part of flag rule: experiment_1Pretend that user 1248 made a purchase? y/nyEyeofcloud recorded a purchase in experiment results for user 1248Flag off. User number 9580 saw flag variation: off and got products sorted by: alphabetical config variable as part of flag rule: experiment_1Pretend that user 9580 made a purchase? y/nnEyeofcloud didn't record a purchase in experiment results for user 9580Done with your mocked A/B test.Check out your report at https://app.eyeofcloud.com/v2/projects/19957465438/reportsBe sure to select the environment that corresponds to your SDK key
# Track how users behave when they see a flag variation# e.g., after your app processed a purchase, let Eyeofcloud know what happened:user.track_event("purchased")