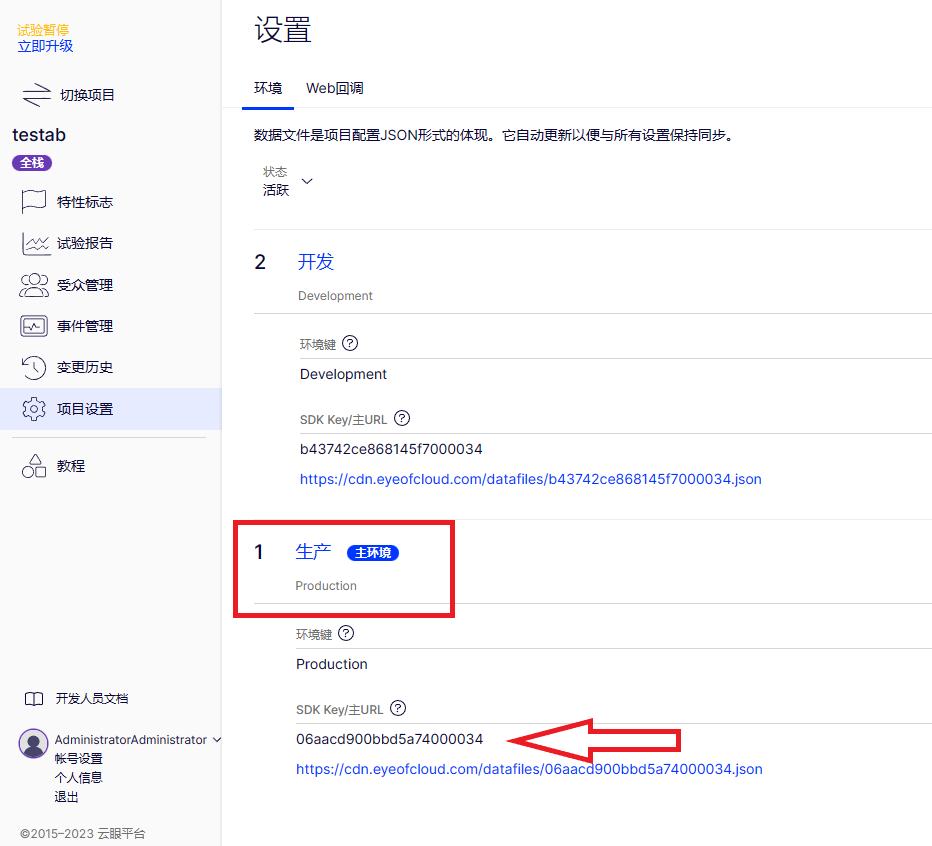
import UIKitimport Eyeofcloudclass ViewController: UIViewController { override func viewDidLoad() { super.viewDidLoad() let eyeofcloudClient = EyeofcloudClient(sdkKey: "YOUR_SDK_KEY", defaultLogLevel: .error) // this Eyeofcloud initialization is asynchronously. for other methods see the Swift SDK reference eyeofcloudClient.start { result in switch result { case .success(let datafile): // -------------------------------- // to get rapid demo results, generate random users. Each user always sees the same variation unless you reconfigure the flag rule. // -------------------------------- var hasOnFlags = false for _ in 0...9 { let userId = String(Int.random(in: 1000...9999)) // -------------------------------- // Create hardcoded user & bucket user into a flag variation // -------------------------------- let user = eyeofcloudClient.createUserContext(userId: userId) // "product_sort" corresponds to a flag key in your Eyeofcloud project let decision = user.decide(key: "product_sort") // did decision fail with a critical error? if decision.variationKey == nil || decision.variationKey == "" { print("decision error: \(decision.reasons)" ) } // get a dynamic configuration variable // "sort_method" corresponds to a variable key in your Eyeofcloud project let sortMethod: String? = decision.variables.getValue(jsonPath: "sort_method") // always returns false until you enable a flag rule in your Eyeofcloud project if decision.enabled { // Keep count how many visitors had the flag enabled hasOnFlags = true } // -------------------------------- // Mock what the users sees with print statements (in production, use flag variables to implement feature configuration) // -------------------------------- print("\n\nFlag \(decision.enabled ? "on" : "off"). User number \(user.userId) saw flag variation: \(decision.variationKey ?? "") and got products sorted by: \(String(describing: sortMethod!)) config variable as part of flag rule: \(decision.ruleKey ?? "")") } if !hasOnFlags { var projectId: Any? if let config: Any = try? JSONSerialization.jsonObject(with: datafile, options: []), let convertedDict = config as? [String: Any] { projectId = convertedDict["projectId"] } print("\n\nFlag was off for everyone. Some reasons could include:\n1. Your sample size of visitors was too small. Rerun, or increase the iterations in the FOR loop\n2. Check your SDK key. Verify in Settings>Environments that you used the right key for the environment where your flag is toggled to ON.\ncheck your key at https://app.eyeofcloud.com/v2/projects/\(String(describing: projectId!))/settings/implementation") } case .failure(_): print("Eyeofcloud client invalid. Verify in Settings>Environments that you used the primary environment's SDK key") } } }}
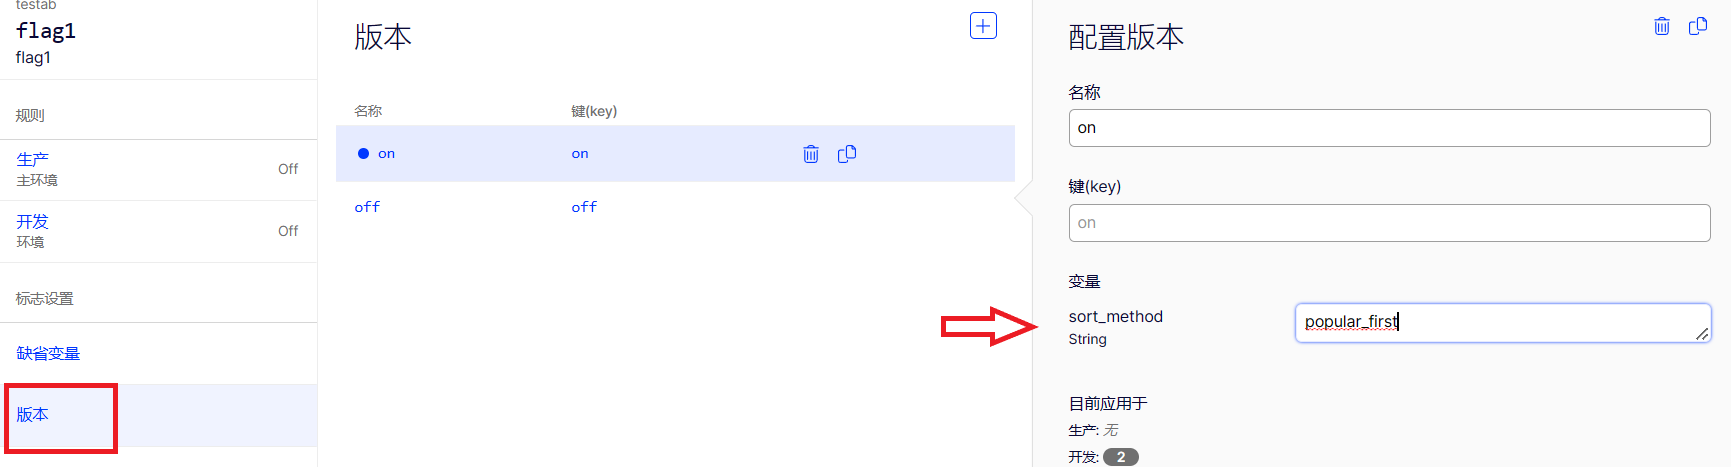
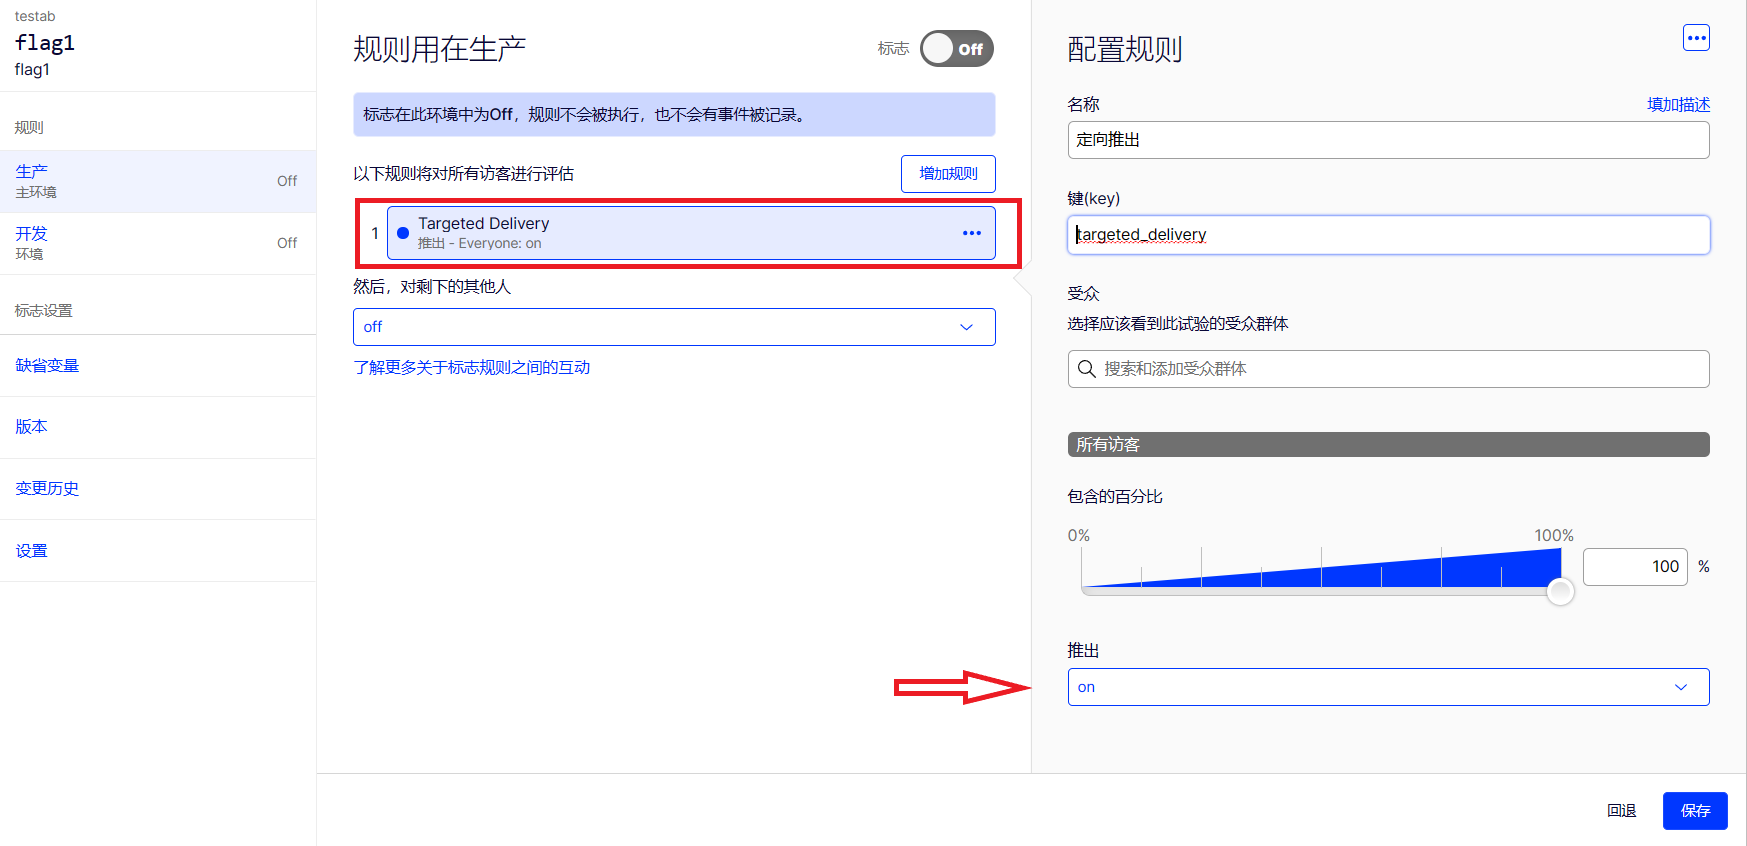
Flag on. User number 6998 saw flag variation: on and got products sorted by: popular_first config variable as part of flag rule: targeted_deliveryFlag on. User number 1177 saw flag variation: on and got products sorted by: popular_first config variable as part of flag rule: targeted_deliveryFlag on. User number 9714 saw flag variation: on and got products sorted by: popular_first config variable as part of flag rule: targeted_deliveryFlag on. User number 4140 saw flag variation: on and got products sorted by: popular_first config variable as part of flag rule: targeted_deliveryFlag on. User number 4994 saw flag variation: on and got products sorted by: popular_first config variable as part of flag rule: targeted_deliveryFlag off. User number 8700 saw flag variation: off and got products sorted by: alphabetical config variable as part of flag rule: default-rollout-208-19963693913Flag off. User number 9912 saw flag variation: off and got products sorted by: alphabetical config variable as part of flag rule: default-rollout-208-19963693913Flag on. User number 6560 saw flag variation: on and got products sorted by: popular_first config variable as part of flag rule: targeted_deliveryFlag on. User number 9252 saw flag variation: on and got products sorted by: popular_first config variable as part of flag rule: targeted_deliveryFlag on. User number 6582 saw flag variation: on and got products sorted by: popular_first config variable as part of flag rule: targeted_delivery
let user = eyeofcloudClient.createUserContext(userId: userId)// "product_sort" corresponds to a flag key in your Eyeofcloud projectlet decision = user.decide(key: "product_sort")
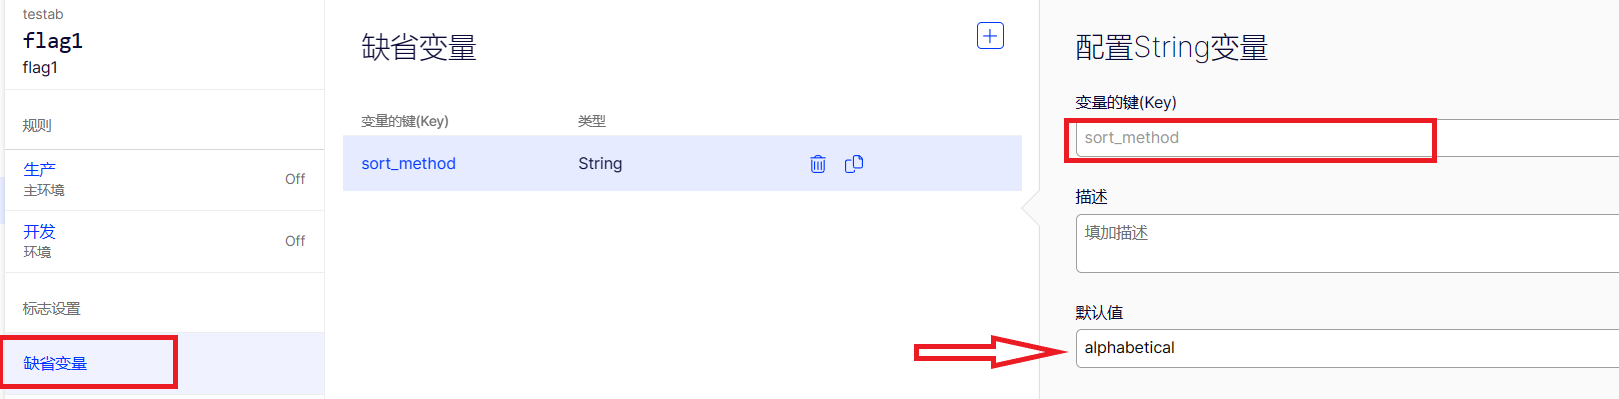
// always returns false until you enable a flag rule in the Eyeofcloud appif (decision.enabled) { // "sort_method" corresponds to variable key you define in Eyeofcloud app var sortMethod = decision.variables['sort_method']; console.log('sort_method: ', sortMethod);}
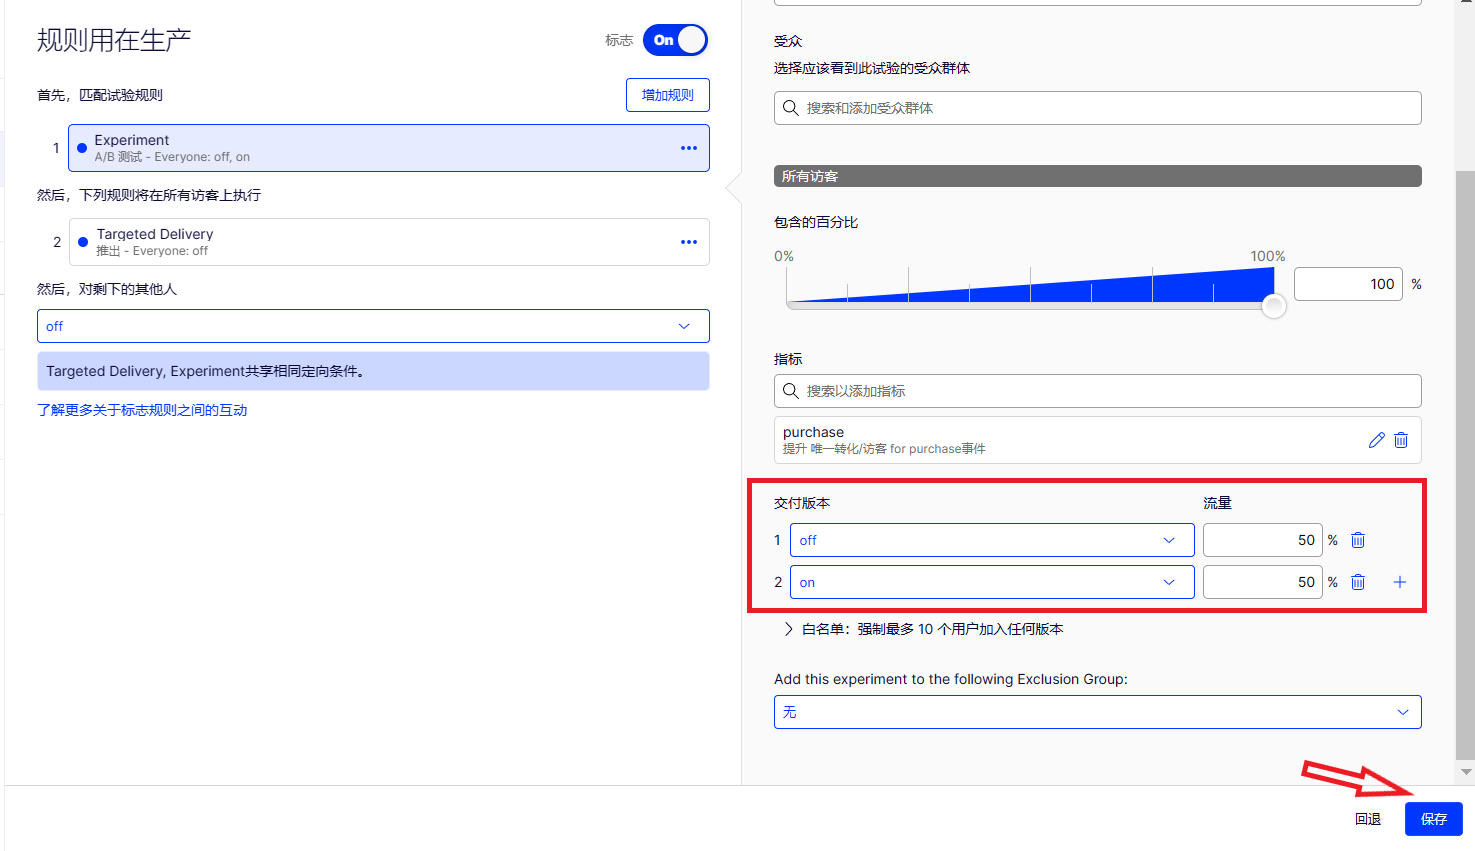
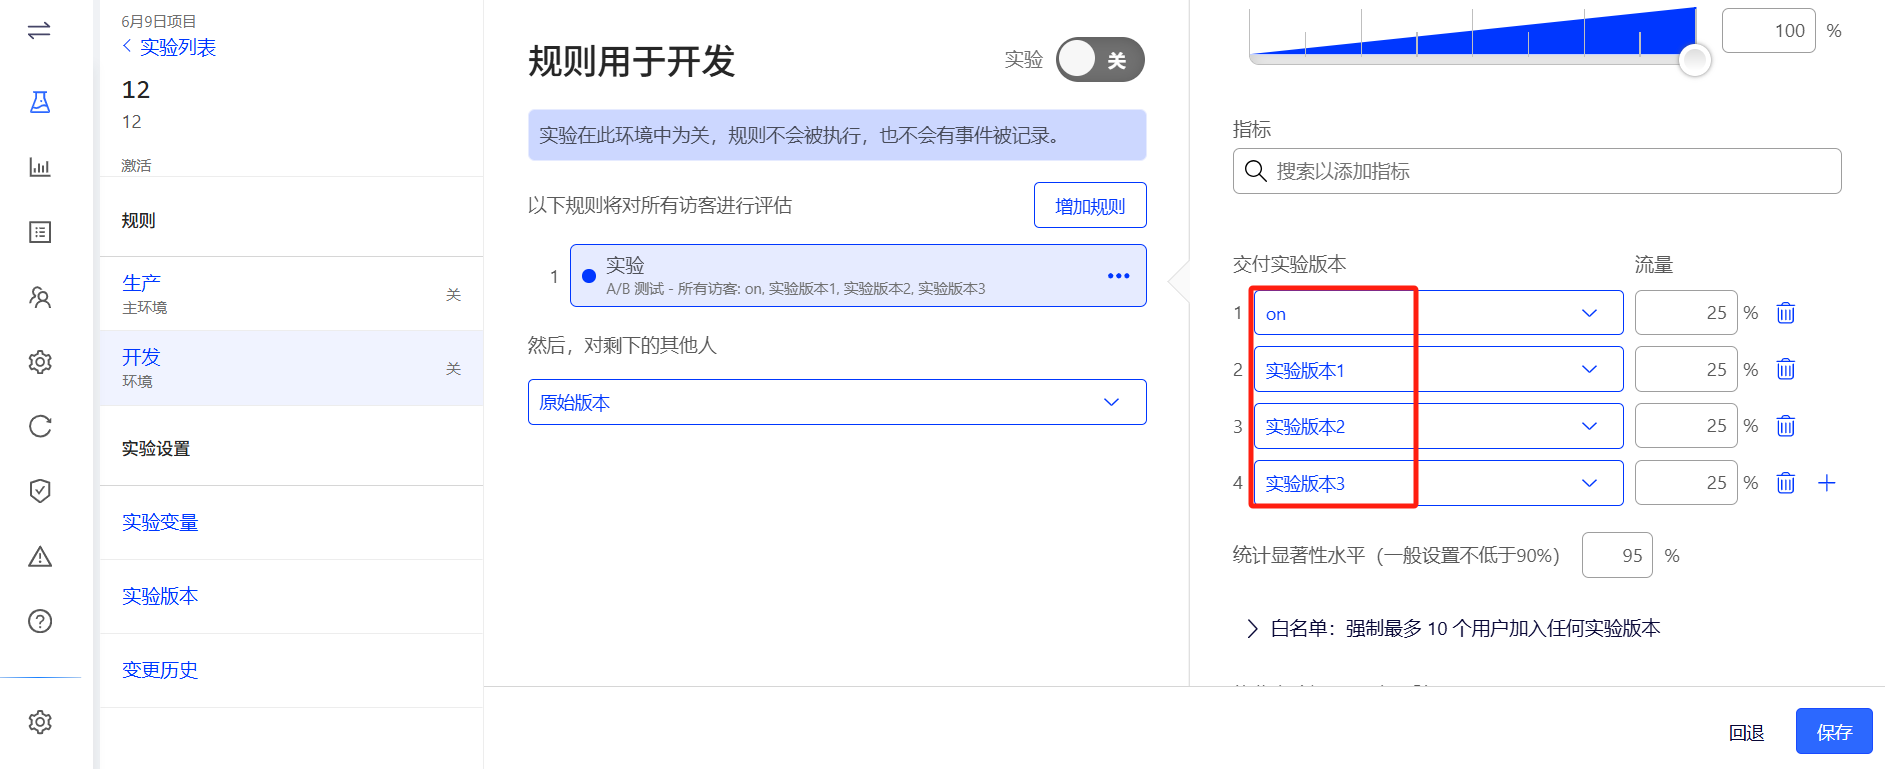
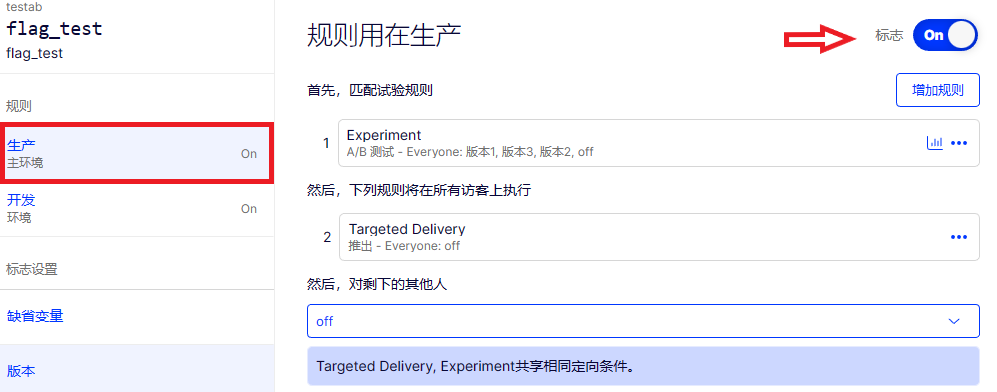
import UIKitimport Eyeofcloudclass ViewController: UIViewController { override func viewDidLoad() { super.viewDidLoad() let eyeofcloudClient = EyeofcloudClient(sdkKey: "YOUR_SDK_KEY", defaultLogLevel: .error) // this Eyeofcloud initialization is asynchronously. for other methods see the Swift SDK reference eyeofcloudClient.start { result in switch result { case .success(let datafile): // -------------------------------- // to get rapid demo results, generate random users. Each user always sees the same variation unless you reconfigure the flag rule. // -------------------------------- var hasOnFlags = false for _ in 0...5 { let userId = String(Int.random(in: 1000...9999)) // -------------------------------- // Create hardcoded user & bucket user into a flag variation // -------------------------------- let user = eyeofcloudClient.createUserContext(userId: userId) // "product_sort" corresponds to a flag key in your Eyeofcloud project let decision = user.decide(key: "product_sort") // did decision fail with a critical error? if decision.variationKey == nil || decision.variationKey == "" { print("decision error: \(decision.reasons)" ) } // get a dynamic configuration variable // "sort_method" corresponds to a variable key in your Eyeofcloud project let sortMethod: String? = decision.variables.getValue(jsonPath: "sort_method") // always returns false until you enable a flag rule in your Eyeofcloud project if decision.enabled { // Keep count how many visitors had the flag enabled hasOnFlags = true } // -------------------------------- // Mock what the users sees with print statements (in production, use flag variables to implement feature configuration) // -------------------------------- print("\n\nFlag \(decision.enabled ? "on" : "off"). User number \(user.userId) saw flag variation: \(decision.variationKey ?? "") and got products sorted by: \(String(describing: sortMethod!)) config variable as part of flag rule: \(decision.ruleKey ?? "")") } //因为swift应用无法在控制台输入y或n,故做此修改 user.trackEvent("purchase") print("Eyeofcloud recorded a purchase in experiment results for user " + user?.getUserId()) if !hasOnFlags { var projectId: Any? if let config: Any = try? JSONSerialization.jsonObject(with: datafile, options: []), let convertedDict = config as? [String: Any] { projectId = convertedDict["projectId"] } print("\n\nFlag was off for everyone. Some reasons could include:\n1. Your sample size of visitors was too small. Rerun, or increase the iterations in the FOR loop\n2. Check your SDK key. Verify in Settings>Environments that you used the right key for the environment where your flag is toggled to ON.\ncheck your key at https://app.eyeofcloud.com/v2/projects/\(String(describing: projectId!))/settings/implementation") } case .failure(_): print("Eyeofcloud client invalid. Verify in Settings>Environments that you used the primary environment's SDK key") } } }}
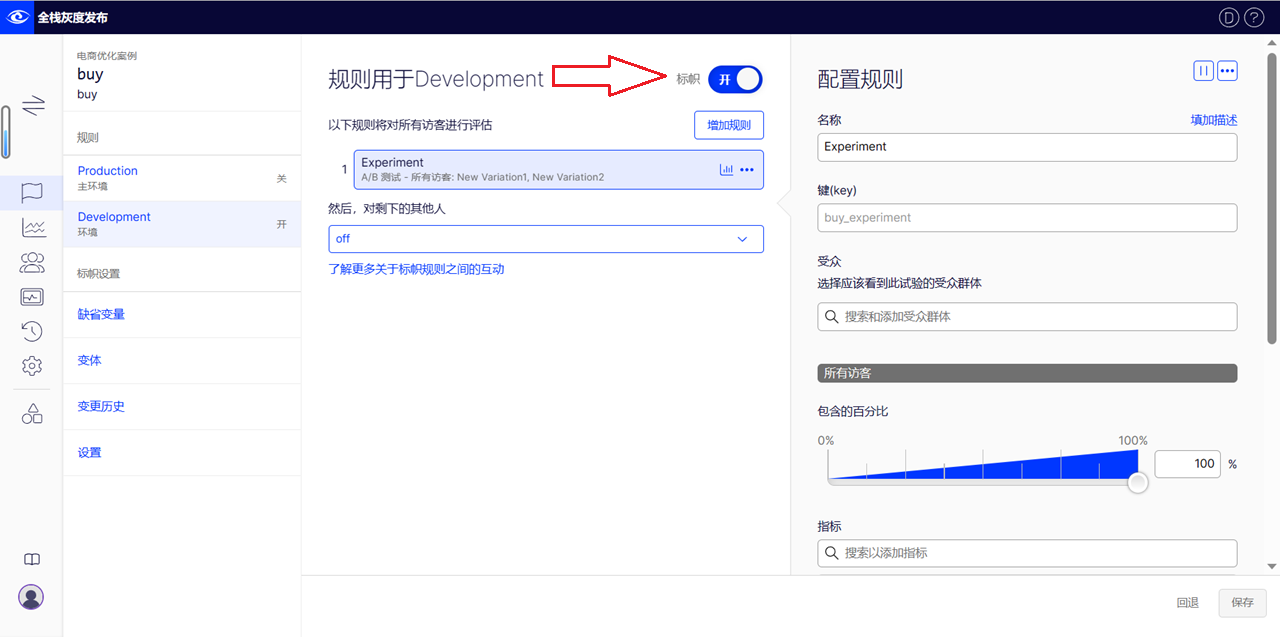
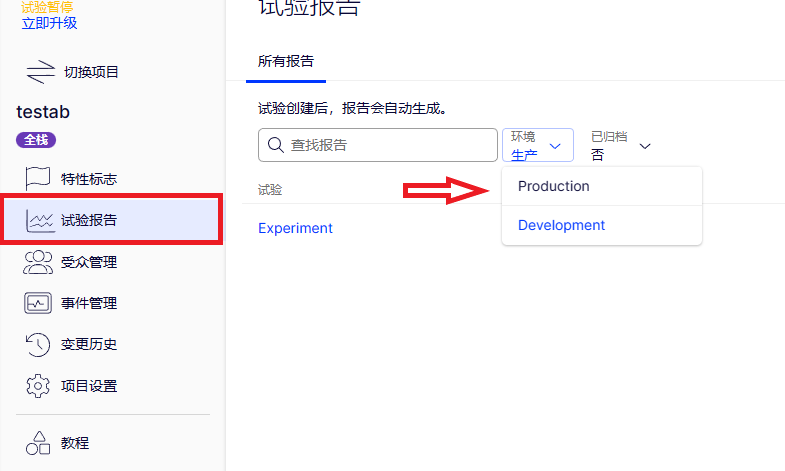
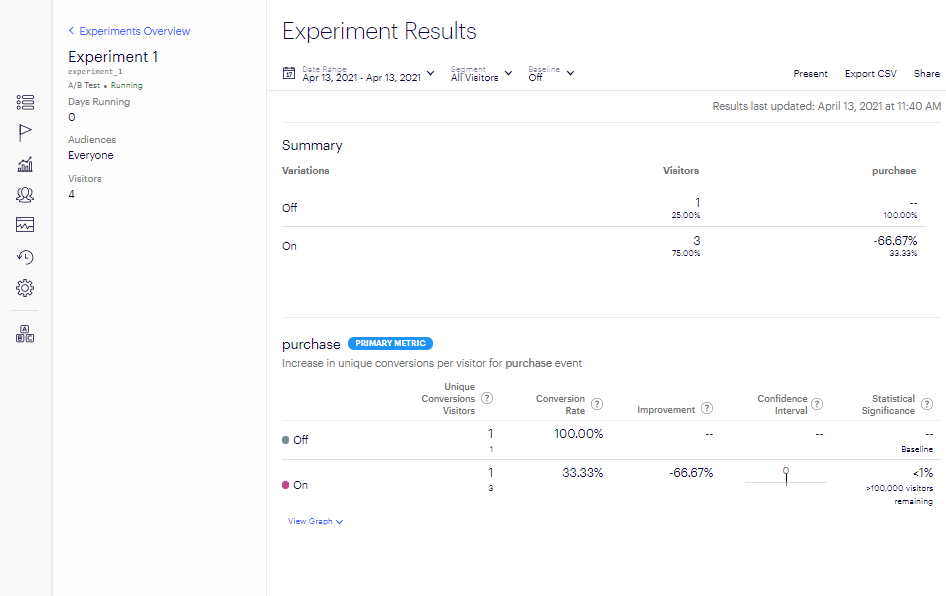
Flag off. User number 6828 saw flag variation: off and got products sorted by: 购买 config variable as part of flag rule: default-rollout-182-270Eyeofcloud recorded a purchase in experiment results for user 6828Flag off. User number 1752 saw flag variation: off and got products sorted by: 购买 config variable as part of flag rule: default-rollout-182-270Eyeofcloud recorded a purchase in experiment results for user 1752Flag off. User number 3035 saw flag variation: off and got products sorted by: 购买 config variable as part of flag rule: default-rollout-182-270Eyeofcloud recorded a purchase in experiment results for user 3035Flag off. User number 7403 saw flag variation: off and got products sorted by: 购买 config variable as part of flag rule: default-rollout-182-270Eyeofcloud recorded a purchase in experiment results for user 7403Flag off. User number 6040 saw flag variation: off and got products sorted by: 购买 config variable as part of flag rule: default-rollout-182-270Eyeofcloud recorded a purchase in experiment results for user 6040[window_scene_session_impl.cpp] ConsumePointerEventInner<555>: InputTracking id:19, windowId:36, pointId:0, sourceType:2, pointPos:[683, 1342], winRect:[0, 0, 1260, 2720], needNotifyEvent:1
// Track how users behave when they see a flag variation// e.g., after your app processed a purchase, let Eyeofcloud know what happened:user.trackEvent("purchased");